How To Use A Shavette For The Perfect Shave
So far, we here at Shaving Advisor have done several reviews and round-ups for the lesser-known shaving razors known as Shavettes. I say lesser known because generally, people overlook these pretty awesome tools in favor of the much more costly straight razors.
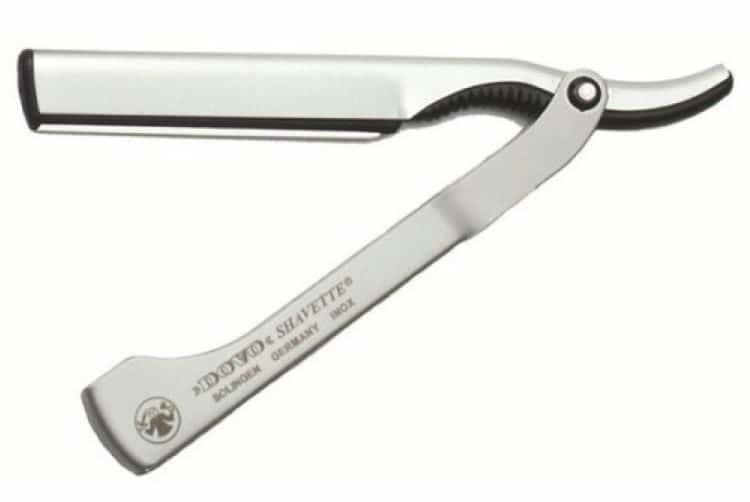
Shavettes have been around in one form or fashion since the early 1800s. The original was known as the frameback razor, which would accept small blades that required no sharpening or grinding. In the modern day, the Shavette (a term originally coined by DOVO Solingen) is a razor similar to a straight razor, but the cutting edge houses a disposable razor blade that can be changed out when it gets dirty or dull.
The benefit of such a tool is that you don’t have to spend time sharpening and stropping a straight razor, and just easily slot in a new blade. It’s perfect for guys who want the experience of shaving with a straight razor, but who don’t have money for a full straight razor – or for those who might want to test a shavette before moving on up to a straight razor.
Literally, the most expensive Shavettes on the market run you about $200 USD, but most decent straight razors START at $150 USD and just go up from there!
All this being said though, we feel it’s time to sit down and really explain how to use these bad boys in your normal shaving routine.
Choosing the Right Shavette For You
Overall, the process of choosing a Shavette is as complex or as simple as you really want to make it.
Really what you want is something that is comfortable for you specifically. For me, the most comfortable Shavette I have used is the Dovo Shavette Razor because of its nice and comfortable grip and longer blade. Though I didn’t start with that one and moved to it after trying several others.
If you have the cash to spare, trying multiple shavettes isn’t a bad option. They are relatively inexpensive. So if shopping around works for your budget, don’t let anyone stop you.
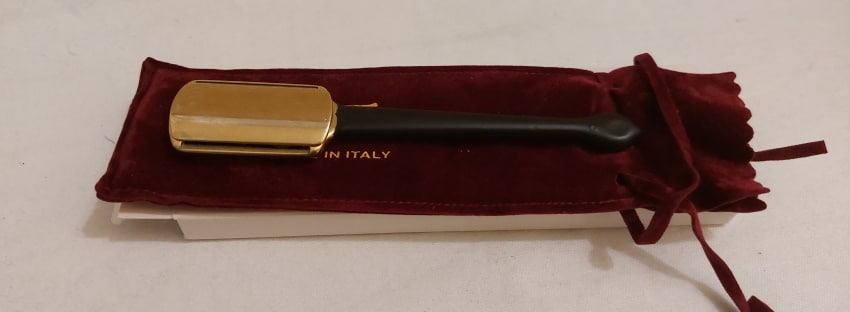
If you are coming from shaving with a safety razor, I would recommend the Razorine Double Edge Shavette as a good jumping-off point. It is for all intents and purposes a safety razor, just on a longer stick. Then if you are feeling adventurous, keep expanding until you find something you really enjoy.
Remember, shaving should be enjoyable and peaceful, not a chore. If you are dreading your shaving routine, then it is time to change something up.
Finding the Right Blades
The right blades MAKE the Shavette. I can talk about comfortable handles and easy use until the cows come home. If your blade isn’t good, though, then it is just going to mangle your face and turn a nice and relaxing shave into an adventure in bloodletting and pain.
Do not skimp on your blade purchase. If you take no other advice from me on this, take this one point. The blade needs to be sharp, and it needs to have some quality to it.
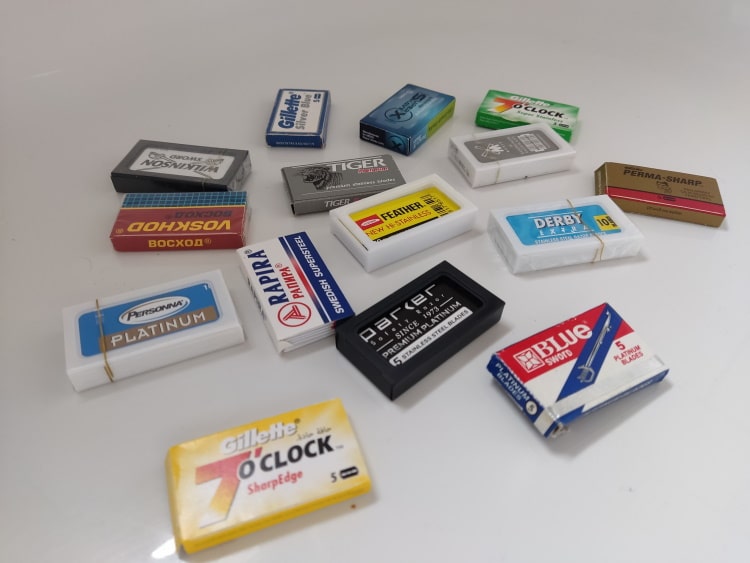
This is where Brand Names are going to be helpful. Muhle, Lord, Parker, Feather, or the like. These brands have been in the shaving game for a while, and they know how to make a blade. Feather is actually one of the better brands on this front, but most of their shavette blades are made for THEIR specific razors. Same with DOVO, but they can also accept smaller blades.
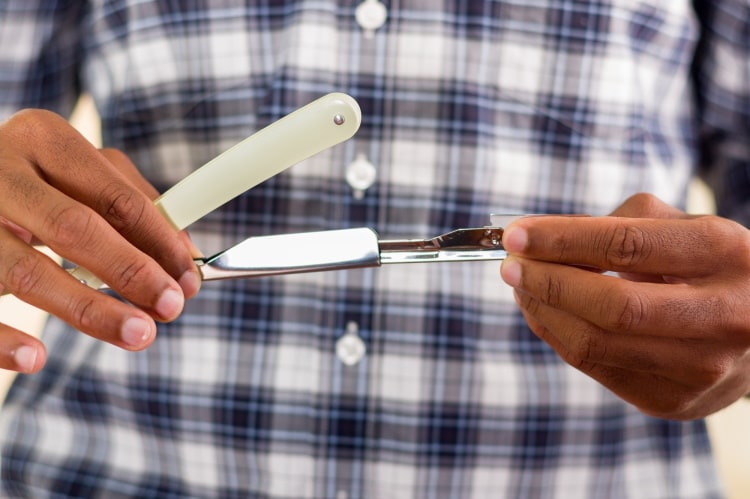
The majority of disposable razor blades you get will need to be broken in half to use correctly. That is a simple process of folding the blade lengthwise until you hear the metal snap. You’ll want to keep them inside the paper packaging to do this because if you slip, you might slice into the meat of your fingers, and that just won’t do.
You can see the process of doing this in the photos of my Dovo review above. It’s a great deal easier than anyone could describe it, and with practice, it can become second nature.
Some brands do offer one-sided blades. Lord, Shark, 7 AM, Perma-Sharp, and Sharp all offer one-sided blades that you can slot in without having to break the blade first, which can be great if you don’t want to worry about leaving half-blades all over the place.
Of those brands, I do recommend Lord, but I have not had the chance to try them all yet.
The Process of the Shave
The process of shaving with a shavette is almost exactly the same as shaving with a straight razor, with just a few extra considerations to take into account. Those considerations we’ll go over as we get to the shave, but it is worth noting now, and any tips you are given about shaving with a straight razor will transfer over to shavette shaving almost seamlessly.
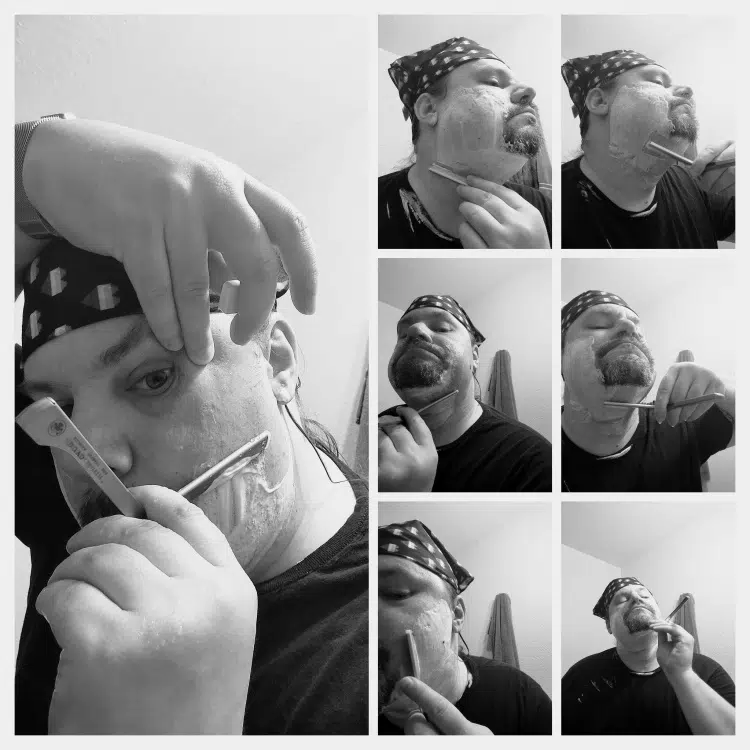
Below is specifically my process for shaving, but there is no universal “THIS IS THE WAY IT MUST BE DONE” way of shaving. My way is based on the tutorials I have read and watched, along with my own experience.
Step One: Prep
The process of prepping to shave could be a whole “how-to” article on its own. So for the purposes of being brief, we can skip over the specifics.
Mostly in the prep phase of shaving, I make sure my face is nice and clean. I scrub my face with soap, warm water, and a clean washcloth. I want to exfoliate as much as I can to avoid the chance of getting ingrown hairs and acne.
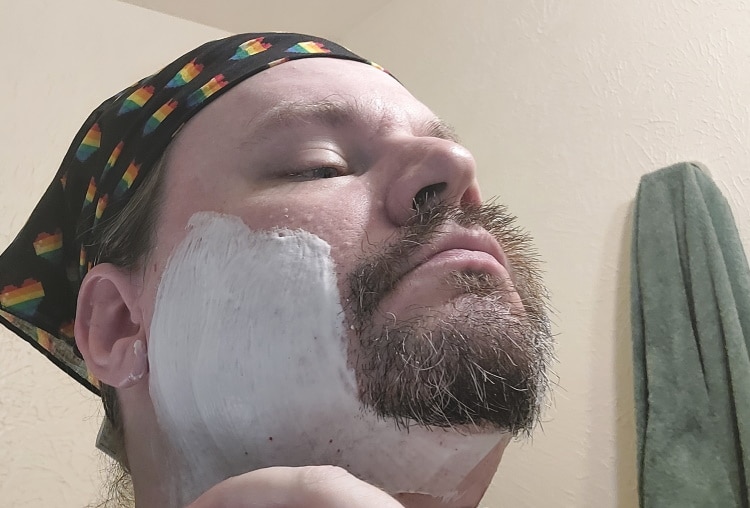
As a long-haired gent, I also take time to tie up my hair and put on a bandana to keep my hair from falling into my face as I shave. Bangs falling into shaving cream and getting sticky is just annoying.
Before scrubbing, I will also set my shave brush to soak in warm water and put a few drops of warm water onto my shaving soap. This will make sure the bristles are ready, and the soap is nice and soft when I am ready to load the brush
Step Two: The Shave
Now we come to the shave itself.
I remove my brush from the water, load it with soap, and get it all lathered up. This process can take anywhere from 30 seconds to 2 minutes depending on the soap I am using. I like to alternate different shaving soaps to try out and enjoy different fragrances.
Once the lather is all ready to go, it’s time to apply a Pre-Shave. You can use whichever you like best, but for the first pass I go for Pre-Shave Oil because it is the easiest and fastest to apply.
Then you lather up and get ready to put metal to face.
Pass 1: With the Grain
For the first pass, you want to shave with the grain of your beard. This will put the least amount of strain on your skin and get the longest of your whiskers first.
You can start on either your left side or your right, whichever is easiest for you.
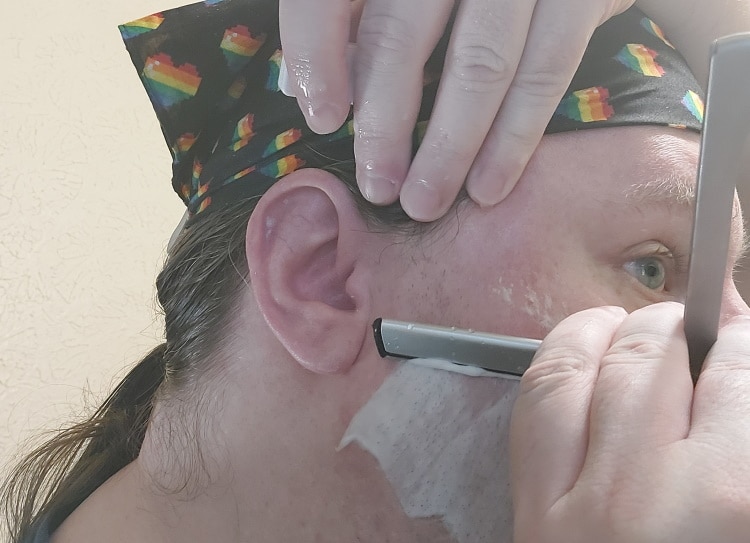
Take your razor in whichever hand corresponds to the side you are shaving, holding it with the back of your hand facing away from you and the blade sticking between your pointer and your thumb.
Your other hand should reach over your head and pull up on the skin of your face and cheek. You want to keep the skin nice and taut while you are shaving to avoid any cuts or nicks.
Slowly, starting at your sideburns, shave downward in shallow strokes. You don’t want to take more than an inch or an inch and a half with each stroke. Once you get to your jaw, stop and go back up, taking more and more off, moving toward your mouth and nose.
Remember, take this slow and easy. Slow is smooth; smooth is fast. Going too fast or making your strokes too long is liable to nick your skin.
Once one side is done, switch hands and do the other. Make sure to keep rinsing off your blade as you go.
If you can’t easily hold your skin taut with your other hand, another trick is to push air into your cheeks and “pooch” them out like a hamster.
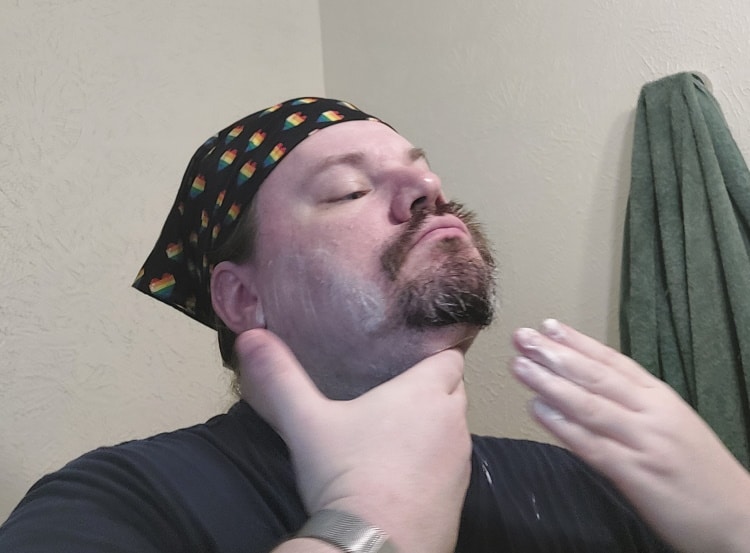
Once your cheeks are done, tilt your head back to stretch the skin on your jaw and neck. Again, moving slowly, drag the blade down and shave your jawline and neck.
Once your neck is all done, rinse off with warm water and pat your face with a towel. Then get ready for Pass 2.
Pass 2: Across the Grain
This is where things are going to get interesting.
After patting dry, I will apply some Proraso Pre-Shave cream to my face for the next pass. Unlike the oil, this one is going to protect your skin a little better because shaving across the grain has more of a chance to cut yourself.
Then apply another layer of shaving cream, and get shaving.
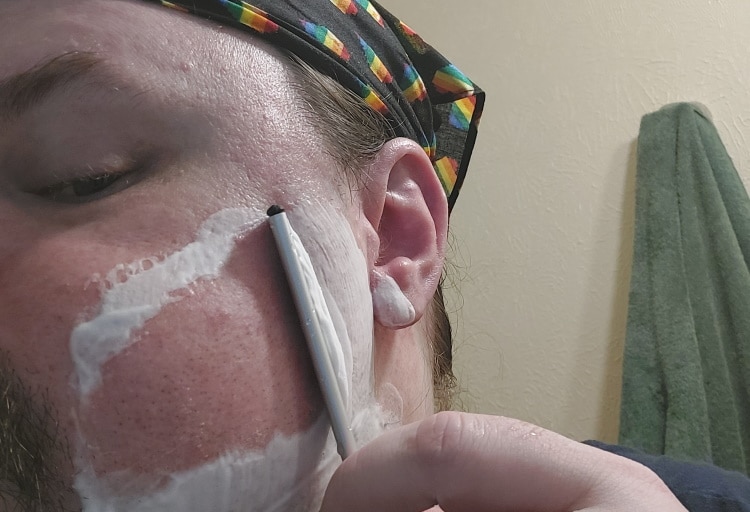
Hold the razor straight up and down, and inflate your cheek again as we did in Pass 1. Slowly shave in short strokes from your mouth to your ear, stopping at your jawline like before. Once one side is done, then switch to the other.
The neck is where this process gets kind of hard to describe.
Starting out on whichever side you choose, hold the razor at an oblique angle and gently shave upward and sideways. Again, make short and shallow strokes here. The idea is you want to shave across your neck and chin and across the grain of your beard.
You might need to either switch hands or (in my case) invert the razor at a certain point to keep this up.
Once you are all done, rinse off again and pat dry. One more Pass to go.
Pass 3: Against the Grain
This pass is a great deal easier than Pass 2, but it is also more likely to cut you. I also prep for this one using Proraso pre-shave.
Lather up like normal and get to shaving.
For this pass, we are going to start on your neck. Tilt your head back to make sure your neck skin is taut. This is important, especially if you are like me and have more than one chin, if you know what I mean.
Starting at the base of your neck, shave upwards toward your jawline with short and shallow strokes. Remember to go slowly. This might feel really weird, especially if this is your first time. The human reaction to sharp knives at our throat is a hard one to overcome. Just move slow and easy and you will be fine.
Go all the way across your neck, shaving in rows up to your jaw. Make sure to rinse your blade every few strokes.
Once your neck is done, with your free hand reach up and pull down on the skin just below the jaw to make it tight, then shave upward over your cheeks. Be very careful as you get to your ears, as if you are going too fast, you could slip and go under your earlobe. Just watch where you are going, and you’ll do fine.
Once more, when you are done, rinse your face and pat dry.
Step Three: the Post Shave
At this point, your skin should be nice and shaved clear, but might be red from three passes with a razor.
Typically at this point I put my shaving dish and brush under running cool water to rinse. While I let them rinse out, I run a damp alum block over every inch of skin I just shaved to make sure it’s clean and close any cuts I might have and soothe any irritation from the razor.
As the alum dries for 30 seconds to a minute on my face, I rinse out the brush and set it to dry on its rack with the shaving dish. Then rinse my face one last time with cool water and dry my skin.
The last overall step is to add a few drops of aftershave for some last-minute antiseptic and scent, and we are all done with the shave routine.
Tips and Tricks
Outside of the above outline, there are a few tips and tricks I can give anyone when they are wanting to start shaving with a Shavette.
- GO SLOW! I don’t know if I can say this enough, but slow and smooth is going to be best for your face, especially when you are learning. If you don’t have the time to shave slowly, then you don’t have the time to shave.
- When you rinse, make sure to let your hands caress your face. You can find your trouble spots easier when rinsing between passes.
- If you feel the razor catch or bite, immediately back off. Pull the razor away and rinse it off. You most likely nicked yourself. It’s not going to be bad, but if you try to just muscle through it, you can turn a small nick into a large cut.
- Switch out for a different razor if you aren’t feeling comfortable. This isn’t some kind of moral judgment. If you feel like you can’t get to a spot with the shavette, then switch to a safety razor or cartridge razor. The Shaving police aren’t going to arrest you if you need to clean up with something different.
- Don’t do a 4th Pass. It’s alright if you need to go in with another razor and clean out some trouble spots, but a full 4th Pass is just going to do murder on your skin. You don’t need that.
- Don’t shave every day! If you are having to shave every day, then you are doing something wrong. Wait at least a day between shaves. Your skin will thank you for it.
- If you are shaving your mustache, don’t shave up toward your nose. That is known as the “Fools Cut,” and it is called that because you are very likely to slip and cut into your own nose. On Pass 3 when shaving the mustache area, shave at an oblique angle away from the center of your face.
Final Thoughts
Shaving with a Shavette is the smoothest shave I have ever received, and that includes a shave from a professional barber with a straight razor. I actually look forward to my shaves during the week thanks to Shavettes, and really enjoy finding a new one to try out.
Here is to hoping that you will enjoy it just as much as I do!
